One-Click Migration
Overview
One-Click Migration allows you to copy label taxonomies, milestones, and Projects v2 Status column structure from one GitHub repository to another in a single action. This is particularly useful when bootstrapping a new repository to match the conventions of an existing project.
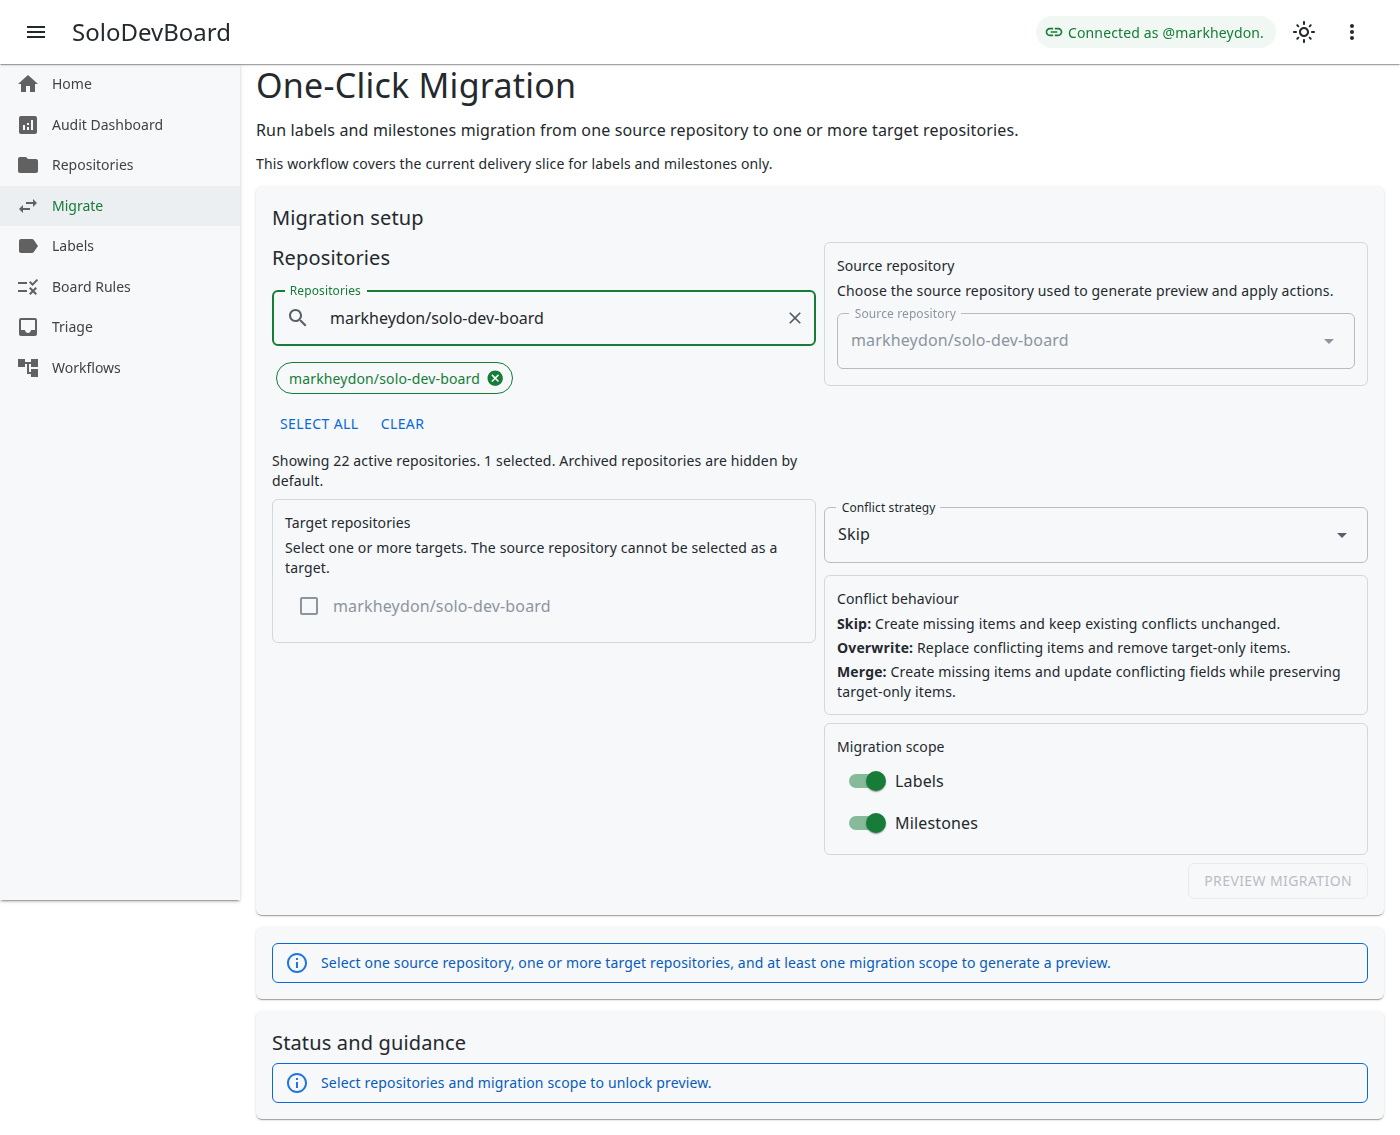
Key goals of One-Click Migration:
- Eliminate the repetitive manual work of recreating labels, milestones, and board columns in new repositories.
- Ensure consistency across related repositories.
- Provide a preview of changes before they are applied, so nothing is overwritten accidentally.
How This Differs from Label Manager
One-Click Migration and Label Manager both help you keep repositories consistent, but they are aimed at different jobs.
- Use One-Click Migration when you want to make one or more target repositories resemble a known-good source repository.
- Use One-Click Migration when the goal is repository setup transfer rather than ongoing label maintenance.
- Use Label Manager when you want to manage labels as a living taxonomy across repositories over time.
- Use Label Manager when you need label-specific operations such as creating, renaming, recolouring, deleting, or re-synchronising labels without treating the whole repository setup as a migration.
One-Click Migration covers labels, milestones, and Projects v2 Status columns (the board-view Status field). It does not copy cards, views, automations, or other custom fields.
Example Use Cases
- You create a new repository and want it to inherit the labels, milestones, and Status columns from an existing repository you already run successfully. Use One-Click Migration.
- You already have several active repositories and want to rename a label, change its colour, or push one new label to all of them. Use Label Manager.
- You want to compare a source repository with one or more targets, review a preview, choose a conflict strategy, and then apply the result. Use One-Click Migration.
- You want an ongoing operational tool for label housekeeping and taxonomy enforcement. Use Label Manager.
How to Use
Step 1 — Select repositories
Choose one source repository and one or more target repositories. The source repository cannot also appear in the target list. Use Reload from GitHub in the migration setup header to refresh catalogues and board options without clearing your source, target, or scope selections. The Preview and Apply buttons remain disabled until at least one source and one target are selected.
Step 2 — Choose migration scope
Use the toggle switches to select which artefact types to include:
- Labels — copies the full label taxonomy from the source repository.
- Milestones — copies milestone titles, descriptions, states, and due dates.
- Project board columns — copies Projects v2 Status option names, colours, descriptions, and order from a selected source board.
Labels and milestones are enabled by default. At least one scope toggle must remain on or the Preview button will be unavailable.
When Project board columns is enabled, additional board selectors appear:
- Choose the source project board whose Status columns are copied. If the source repository has exactly one supported board, it is selected automatically.
- For each target repository, choose an existing linked board or Create a new board. Preview stays disabled until every target has a board selection.
Important
If GitHub reports linked boards that cannot be loaded with the current sign-in (commonly private user-owned boards under GitHub App sign-in), an on-page warning is shown with the same guidance as Triage.
Step 3 — Choose a conflict resolution strategy
Select how existing artefacts in each target repository are handled when a match is found:
| Strategy | Behaviour |
|---|---|
| Skip | Conflicting items in the target are left unchanged. When Labels is in scope, a nested Ignore area/* labels checkbox appears (on by default) so source labels whose names start with area/ are not copied; uncheck it to copy those names like any other label. |
| Overwrite | Conflicting items are replaced with those from the source. Unused target-only Status options may be removed when no board items use them. A warning is shown before you confirm. When Labels is in scope, a nested Keep area/* labels checkbox appears (on by default) so target labels whose names start with area/ are kept instead of deleted; uncheck it to treat those names as ordinary target-only deletes. The nested Ignore area/* labels control (also on by default) excludes source area/* names from create and update and is independent of Keep. |
| Merge | Conflicting items are replaced with source values; items that exist only in the target are preserved. When Labels is in scope, Ignore area/* labels (on by default) excludes source area/* names from create and update. |
Step 4 — Review the preview
Click Preview migration to generate a read-only diff for each target repository. No changes are made at this stage.
The preview card for each target shows:
- Labels — tables listing labels to create, update, and delete, with colour, name, and description for each row. When Ignore
area/*labels is on, ignored sourcearea/*names are summarised by count (not listed in the create or update tables). When Overwrite is selected and Keeparea/*labels is on, keptarea/*target labels are summarised by count (not listed in the delete table). - Milestones — tables listing milestones to create, update, and delete, with title, state, due date, and description for each row.
- Status columns — tables listing Status options to create, update, and delete, with name, colour, description, and order for each row. Warnings explain when a new board will be created or when options cannot be removed safely.
If the preview shows no actionable changes for a target repository, an information notice is displayed instead and the Apply button is not shown.
Setup guidance, preview warnings, and ready-to-apply notices appear inline in the migration setup region beside the preview and apply actions. Transient operation outcomes (preview errors, apply summaries, and cancellations) appear as snackbar toasts. Repository load failures appear at the top of the migration setup region with a retry action.
Step 5 — Apply the migration
Once you are satisfied with the preview, click Apply migration. This button only appears when there is at least one actionable change across all target repositories.
Warning
If you selected the Overwrite strategy, an on-page warning is shown before destructive changes are applied, including Status options that may be removed when unused.
Partial failures are reported per target repository — a failure for one target does not abort the remaining targets.
Step 6 — Review the post-migration summary
After migration completes, a summary view is shown for each target repository in the post-migration summary region.
- Labels, Milestones, and Status columns rows display the number of items created, updated, deleted, and skipped for each enabled artefact type.
- Partial failures are reported per target repository, with error messages shown inline for any unsuccessful operations.
- Status column warnings (for example, options that could not be removed because items still use them) are shown inline after apply.
Configuration
One-Click Migration is configured entirely through the UI workflow. There are no appsettings.json entries specific to this feature.
- Conflict resolution strategy (skip, overwrite, or merge) is selected per migration run.
- Scope selection (labels, milestones, and/or project board columns) is toggled per migration run. Labels and milestones default to enabled.
- Deletion of artefacts present in the target but absent from the source is available via the Overwrite strategy.
Authentication for project board columns
read:project for PAT mode). Applying Status column changes additionally requires write access to Projects (project scope for PAT mode, or repository/organisation Projects: Write for hosted GitHub App sign-in on accessible boards).